
Introduction
The following routine sets up a standard Sunlight System (this uses a target direct light), including ambient light and standard shadow map settings. New users can use this routine as a 'good start' and it will help them understand what settings effect the lights and shadows. This basic setup and settings routine can be fine tuned depending on the effect required
NOTE: Refer to the MAX/VIZ Help for extensive notes on use of IES Sun, IES Sky or a Texture Sky
Download Sample Data
In order to follow this tutorial, you may want to use the supplied files. Please read the sample data instructions before downloading.
kf402_files.zip (385kb)
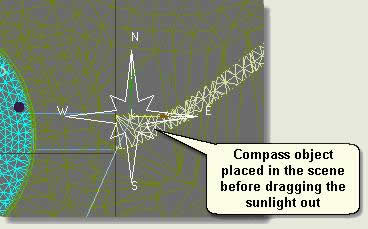
Place a Sunlight System in the scene and configure
NOTE: Notice that in the User viewport the scene is 'bleached'. This is an unfortunate effect of the Daylight System so the Scene's default lighting needs to be used to view the scene comfortably in the viewport. To see the effects of changes in sunlight parameters test render the scene at each stage
- Viewport Configuration dialog > Uncheck Default Lighting if this is checked. This will display the basic effects of the sunlight in the viewport
To optimise the sunlight for rendering quickly change the parameters of the Sunlight in the Modify Panel thus:
- General Parameters rollout > Shadows - Set this to Shadow Map
NOTE: The Ray Traced Shadows option calculates accurate and fine shadows. However, for infrastructure and landscape work where the scene 'load' can be great this type of shadow can have major effect on rendering times. This tutorial shows you how to configure Shadow Mapped Shadows to reproduce the effect of ray traced shadows. Efficiency in rendering time is therefore greatly increased
- Directional Parameters rollout > Light Cone > make sure Show Cone is checked and Overshoot is unchecked
- Move the Hot Spot spinner up until the Sunlight cone just surrounds the site to be illuminated. If this goes to far from the edges of the site the shadows will become less sharp. Adjust the Falloff similarly, but this time move it down to decrease the size of the Hot Spot. Try to keep the Falloff size as close to the Hotspot size as possible (there is always a small discrepancy)
- Left click to finish the Sunlight creation
- Throughout the next steps test render the scene at each stage
Set location and time
- Sunlight Parameters rollout > Setup
- Control Parameters > Set the time to 11.00 am, the month to 8 and the day to 20
- Press Get Location and in the Map dropdown list pick Europe. In the City list pick a City (Birmingham UK for example). The Sunlight will then be positioned in the sky as it would be in Birmingham on August 20th at 11.00am
Logarithmic Exposure Control
- Environment dialog > Exposure Control rollout > set this to None if Logrithmic Exposure Control is selected
NOTE: MAX and VIZ are different in the exposure control settings in that VIZ defaults to Logrithmic exposure control On but MAX defaults toNone. Turn this off for now and use it later if required
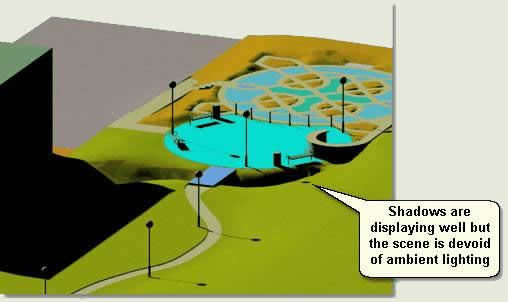
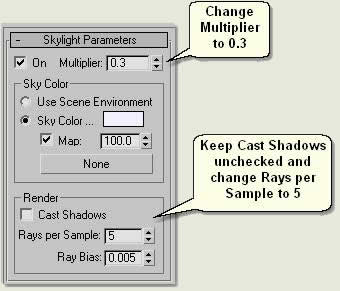
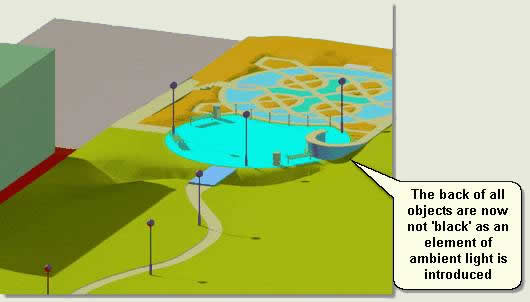
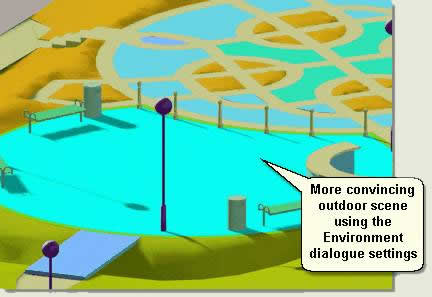
If just a Sunlight System is used (ie one light), then the sides of objects that are not in sunlight will appear very dark or black and shaded areas will appear too dark next to lighter areas. This is a totally unnatural situation. In the real world light is reflected from surface to surface giving shaded areas an element of light and more subtle shade. This type of lighting is called 'ambient' light. To recreate ambient light in a scene a Skylight light object can be used with the shadow settings turned off and further tweeks made through the Environment dialog settings NOTE: In MAX rendering with light tracing is often used to give very good global illumination (not covered in Key Fundamentals) TIP: This tutorial does not explain the Exposure Control settings (there are enough to think about initially). However, if you do want to experiment choose Logarithmic Exposure Control in the dropdown list. Experiment with mainly Brightness, Contrast and Physical Scale, producing test renderings to evaluate results. To start with lower the brightness to about 10 NOTE: Key Fundamentals does not cover Atmospheric Effects such as Fog, Volume Fog and Volume Light. Reference MAX / VIZ Help for in-depth information on how to setup these effects On the Sunlight parameters: NOTE: When a scene is first opened the time slider is set to 0. The scene will appear dark until the Sunlight is animated back to the required time of day using the time slider. In general, animate the Sunlight for quick shadow studies, then remove the animation by right clicking on any key (below the Time Slider) and selecting Delete Key > AllSunlight settings
Provide ambient lighting
Environment Dialog settings
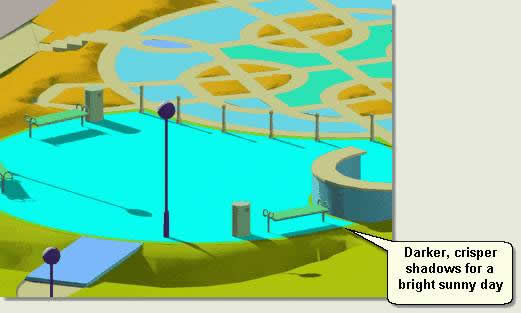
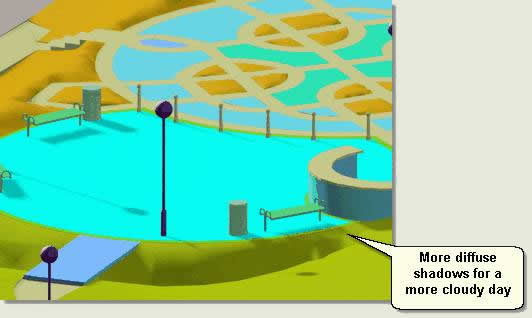
Fine-tune shadow settings
To animate the Sunlight through the day

No comments:
Post a Comment